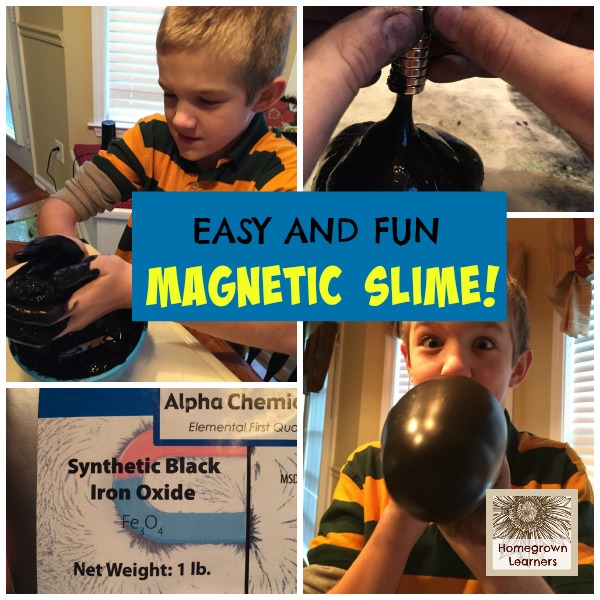
Magnetic Slime has been on my "to do" list for a long time.
Do you have one of those lists? (You know -- the "do this fun stuff with my kids" list?)
For me, the list usually consists of things I've seen on Pinterest that look SUPER fun, that I will save for "one day".
Guess what?
ONE DAY may never come. All we are guaranteed is today, so I am resolving to do these projects a lot more often!
Funny thing, however, was that this fun science project coincided directly with the beginning of our study of the Periodic Table of Elements. Fun and learning collide.
Bam.
I love homeschool.
Let me talk you through how to make the slime (I promise it wasn't bad at all), and then I'll share some great Periodic Table resources with you, too!
*This post contains affiliate links.
Magnetic Slime Supplies
I like to be UBER prepared when doing a messy craft project, so I've laid out every last thing you will need, right down to the soap for washing your hands!
Also, you might want to go in with some friends on this project (unless you have some other uses for Liquid Starch and Iron Oxide, which I really didn't!) - you will have a lot of leftover Iron Oxide and Liquid Starch.

Supplies You Probably Have On Hand:
- disposable bowls
- disposable gloves - the slime can stain your fingers for a few days if you don't use gloves
- craft sticks (or some other stirrer you can throw away)
- paper towels
- hand soap
- old tablecloth - or some surface to work on that you can get stained
- Elmer's School Glue
- straws - for blowing SLIME BUBBLES!
Supplies You Need to Purchase:
- Liquid Starch - I ordered the Sta-Flo directly from Amazon.
- Iron Oxide Powder
- Neodymium Rare Earth Magnets -- Regular magnets will not be strong enough
How to Make Magnetic Slime
1. Pour 1/4 cup of starch into disposable bowl. Add 2 tablespoons iron powder. Stir until mixed well.
*Be careful with the iron powder. It is black and messy. Plan accordingly!
2. Add 1/4 cup white school glue and stir until mixed. You will need to stir a while, because it doesn't look like much at first.
3. Now the fun comes! Remove the slime from the bowl (it will be very liquidy) and mix with your hands. Mix well until you have a ball of slime (there will be liquid left over in the bowl).
*We used an old cutting board that could get stained - it allowed my son to set the slime down periodically.

4. When you feel that you have a good ball of slime, pat it dry with a paper towel.
*You can wash your hands now, because playing with the slime ball won't stain your hands very much, but you will want to get all of that intial black stain off if you haven't been wearing gloves.
5. Play with your slime!
What Can You Do With Magnetic Slime?
Kids will come up with all kinds of things to do with their slime.
Just squishing the slime around is tons of fun.
My son made slime mountains.

You can also make slime bubbles.
Simply poke a straw into a small ball of the slime (don't let it poke all the way through - you want the end of the straw to be covered), stretch the slime about half way up the straw, then blow!
Slime Bubble!

The Science Behind the Slime
I prefaced this activity by telling my son we were going to do something fun with elements from the Periodic Table: Iron and Oxygen - which together make Iron Oxide. Common rust is a form of Iron Oxide.
The Iron Oxide Powder contains iron filings, which are the magnetic material.
Did you know that there are three elements that are magnetic at room temperature? Iron, Cobalt, & Nickel (which we saw were grouped together on our handy dandy Periodic Table Placemat!)
The glue and borax, when mixed together form a polymer.
The iron filings don't come out of the slime because of adhesion, which is the force that binds molecules together. The slime itself is bonded together by cohesion - the force that holds moleclues of the same substance together.
Magnetism, Adhesion, and Cohesion are what makes your strechy slime mountains!
Resources to Study the Periodic Table
We will be learning the basics of the Periodic Table this semester, so these are simple resources to provide a general overview.
- Periodic Table Placemat
- Periodic Table Coloring Book
- Printable Elements Cards - FREE!
- Periodic Table Video - Crash Course Chemistry
Happy Slime Making -- oh, and learning, too!
You might also like:
History Notebook - CC Cycle 3 Weeks 13-24
Are you a part of the Homegrown Learners' community?
Subscribe to receive updates!
